If there’s one dish that can carry an entire holiday dinner on its back, it’s a good brisket. Not the fancy smoked kind that takes all day and a dedicated pit — I mean the kind your grandmother made in a Dutch oven with onions piled high, the lid sealed tight, and four hours of patience that turns a tough cut of beef into something so tender it practically falls apart when you look at it.
Jake’s mom used to make brisket every Easter when he was growing up. She’d start it first thing in the morning while the rest of the house was still sleeping, and by the time everyone was dressed for church the whole kitchen smelled like onions and roasting beef. The first time she handed me the recipe, it was three lines on the back of an envelope: season the meat, pile on the onions, low and slow. That’s really all there is to it, if you trust the process. (If you love this kind of low-and-slow cooking, my Brown Sugar Glazed Ham follows the same spirit.) It took me three tries before I stopped opening the oven to check — but once I learned to leave it alone, this became one of the most dependable dinners I know how to make. My Scalloped Potatoes are what I always serve alongside it.
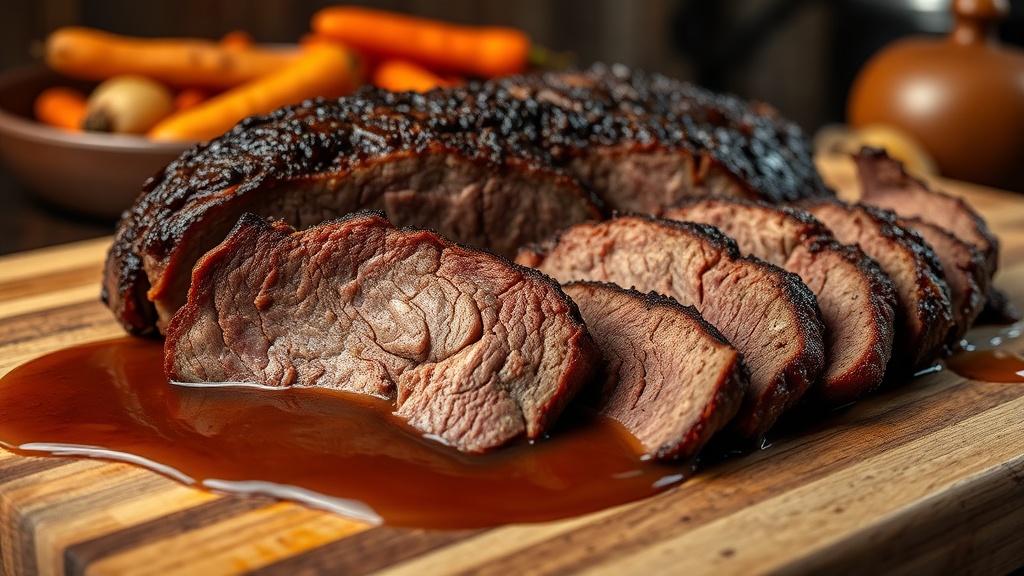
Nana Ruth had her own version, of course. She used a bigger roast and more garlic, and she always threw in a few carrots the last hour so they soaked up all that beefy, oniony broth. I borrowed that trick and never went back. The carrots aren’t in the official recipe card below because Jake’s kids aren’t carrot people, but trust me — if yours are, toss them in at the three-hour mark.
Why This Brisket Works Every Time
The trick is the sear at the beginning. Five minutes per side in a screaming hot pan gives you that deep brown crust that turns into flavor in the braising liquid. Don’t rush it. If the meat isn’t sizzling loud enough to hear from the next room, your pan isn’t hot enough. And those onions — three big ones, sliced thick — they cook down into this sweet, silky bed that practically becomes the gravy. A little tomato paste, some Worcestershire, beef broth, and you’re done. The oven does the rest.
I make this for Easter, but it’s just as good for any holiday gathering. It feeds a crowd, it’s budget-friendly compared to a prime rib, and the leftovers make sandwiches the next day that are honestly better than the dinner itself. Jake takes brisket sandwiches on pumpernickel to work for a solid three days after I make this, and he never complains once. If your table includes family celebrating Passover, this works beautifully for that too — it’s one of those recipes that crosses every line that matters.
Tips from My Kitchen to Yours
Choose the right cut. You want a flat-cut brisket, sometimes labeled “first cut” at the grocery store. It’s leaner and slices more evenly than the point cut. Ask the butcher if you’re not sure — they’ll steer you right.
Slice against the grain. This is the single biggest difference between tender slices and tough ones. Look for the long lines running through the meat and cut across them, not along them. Let the brisket rest at least 15 minutes before slicing — it needs time to reabsorb those juices.
Low and slow wins. 300 degrees for four hours. Don’t bump the heat to save time. The collagen in brisket needs long, gentle heat to break down into gelatin, which is what gives you that melt-in-your-mouth texture. Rushing it gives you shoe leather.
Make it ahead. Brisket actually tastes better the next day. Cook it the day before, refrigerate it whole in the braising liquid, then slice and reheat gently. The flavors deepen overnight in a way that same-day brisket just can’t match.
Frequently Asked Questions
Can I make this in a slow cooker? Absolutely. Sear the brisket first, then transfer everything to the slow cooker. Cook on low for 8-10 hours. The texture won’t be quite as rich as the Dutch oven version, but it’s still wonderful — and it frees up your oven for sides.
How much brisket do I need per person? Plan for about half a pound per person, raw weight. Brisket shrinks as it cooks, so a 4-pound roast comfortably feeds 6-8 people with some leftovers.
What sides go best with brisket? Mashed potatoes are the obvious choice — they soak up that braising liquid like a dream. Roasted root vegetables, a simple green salad, and fresh rolls round out the plate. For Easter, I always serve it alongside deviled eggs and my asparagus casserole.
Can I freeze leftover brisket? Yes, and it freezes beautifully. Slice it first, then store in an airtight container covered with braising liquid. It keeps for up to 3 months. Thaw in the fridge overnight and reheat gently in a 300-degree oven, covered with foil.
Old-Fashioned Beef Brisket
Ingredients
- 4 pound beef brisket flat trimmed to 1/4 inch fat cap
- 3 large yellow onions, sliced thick
- 2 tablespoons tomato paste
- 2 tablespoons Worcestershire sauce
- 1 1/2 cups beef broth
- 4 cloves garlic, smashed
- 2 tablespoons vegetable oil
- salt and black pepper generous seasoning
Instructions
-
Preheat oven to 300 degrees F. Season the brisket generously on all sides with salt and pepper.
-
Heat oil in a large Dutch oven over high heat. Sear the brisket for 5 minutes per side until deep brown on both sides. Remove to a plate.
-
Reduce heat to medium. Add the sliced onions and cook for 5 to 7 minutes until softened and starting to caramelize.
-
Stir in garlic and tomato paste, cooking for 1 minute. Pour in beef broth and Worcestershire sauce, scraping up the brown bits.
-
Nestle the brisket back into the pot, fat-side up. The liquid should come about halfway up the sides. Cover with a tight-fitting lid.
-
Braise in the oven for 3.5 to 4 hours until the meat is fork-tender and pulls apart easily.
-
Remove from oven and let rest with the lid on for 15 minutes. Slice against the grain into thin slices and spoon the braised onions and pan juices over the top.
More Recipes You’ll Love
- Nana Ruth’s Brown Sugar Glazed Ham
- Yogurt-Marinated Roast Chicken
- Nana Ruth’s Matzo Ball Soup
- Creamy Asparagus Casserole
What I Use for This Recipe
A couple things from my kitchen that make this one easier.

Set it before school drop-off, come home to dinner. The most-used appliance in my kitchen after the stove.

For every stew, pot roast, and soup that needs low-and-slow love. The pot I reach for on Sundays.

Pancakes slide right off. Eggs never stick. The pan the kids are actually allowed to use.
This post contains affiliate links. As an Amazon Associate, I earn from qualifying purchases at no extra cost to you. I only recommend tools I actually use. See all my kitchen picks