I’m not going to tell you these are gourmet. They’re not. This is Nana Ruth’s classic deviled eggs recipe—the one she made for every church potluck, every Easter, every funeral, and every family reunion where someone needed to bring “the eggs.” The eggs were always Nana Ruth’s job because nobody else could get them right.
When Nana Ruth taught me this recipe in my twenties, she handed me a worn note card with her handwriting cramped across it. No amounts—just “mayo, mustard, salt, pepper, paprika.” I asked her how much of each. She just laughed and said, “Maggie, you’ll know when it tastes right. That’s how cooking works. You taste and you adjust.”
So I did. I’ve made this deviled eggs recipe maybe a hundred times since then—for potlucks at church, for Easter Sunday, for Fourth of July picnics where the sun beats down and the deviled eggs are the first thing to disappear from the table. I’ve tried the fancy versions with sriracha and truffle oil, but I always come back to this one. Because Nana Ruth was right: simple works.
Last Easter, Clara asked if she could make the deviled eggs all by herself. This is the child who organized her stuffed animals by height and color at age four. She boiled the eggs, peeled them with surgical precision, and piped the filling using a zip-lock bag with the corner cut off. Every single egg was identical. Nana Ruth would have been so proud.
How to Make Nana Ruth’s Classic Deviled Eggs
Start with the eggs. Place a dozen eggs in a single layer in a pot, cover with cold water by about an inch, and bring to a rolling boil. As soon as it boils, cover the pot, turn off the heat, and let them sit for exactly 12 minutes. Then transfer to an ice bath. This method gives you perfectly cooked yolks every single time—no gray-green ring.
Peel and halve. Once the eggs are cool, peel them under running water (the shells slide right off when they’re cold). Slice each egg in half lengthwise and gently pop the yolks into a bowl. Line the whites up on your serving plate.
Mix the filling. Mash the yolks with a fork until they’re smooth, then stir in mayo, yellow mustard, a tiny splash of pickle juice (Nana Ruth’s secret), salt, and pepper. Taste it. Adjust. That’s the whole philosophy. You want it creamy and tangy with just a little bite from the mustard.
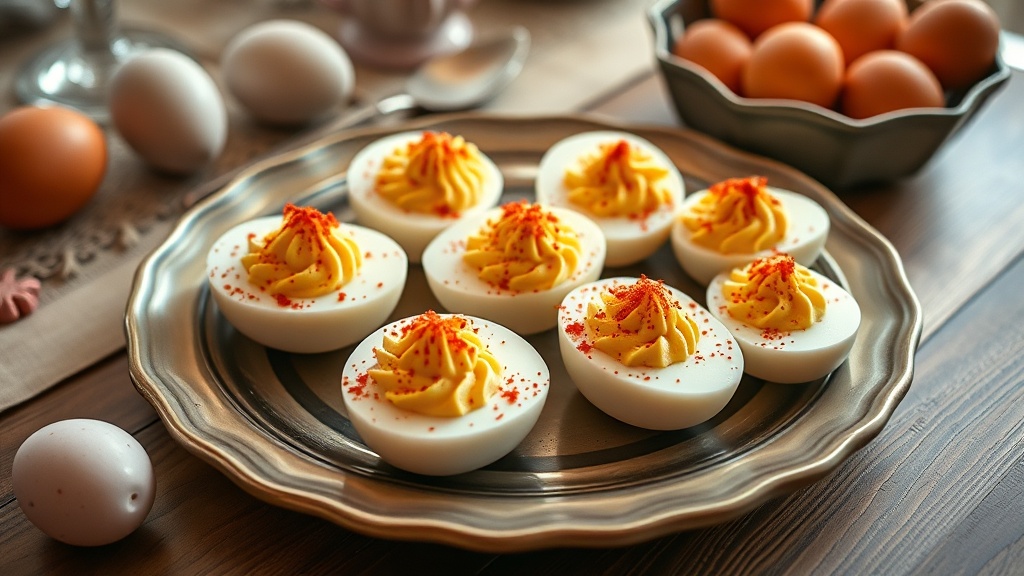
Fill and finish. Spoon or pipe the filling back into the whites—Clara uses a zip-lock bag with the corner snipped off for neat swirls. Sprinkle with paprika. That’s it. Refrigerate until you’re ready to serve. They’re best within a few hours, but they’ll hold overnight covered in the fridge.
These eggs belong on every holiday table next to my Nana Ruth’s Scalloped Potatoes and Creamy Asparagus Casserole. For a modern twist on Nana Ruth’s recipe, try Clara’s Spring Herb Deviled Eggs — Clara likes hers with a little more green.

Nana Ruth's Classic Deviled Eggs
Ingredients
- 12 large eggs
- 1/3 cup mayonnaise Duke brand or similar
- 1 tablespoon yellow mustard
- 1 teaspoon white vinegar
- salt and pepper to taste
- paprika for garnish
- 1 tablespoon sweet pickle relish optional — Nana Ruth's secret
Instructions
-
Place the eggs in a single layer in a large pot and cover with cold water by about an inch. Bring to a boil over medium-high heat. Once boiling, cover, remove from heat, and let sit for 12 minutes.
-
While the eggs cook, prepare an ice bath in a large bowl. When the 12 minutes are up, transfer the eggs immediately to the ice bath. Let them cool completely, about 15 minutes.
-
Peel the eggs carefully and slice each one in half lengthwise. Gently scoop the yolks into a medium bowl. Arrange the whites on a serving plate.
-
Mash the yolks with a fork until smooth. Add the mayonnaise, mustard, and vinegar. Mix until light and fluffy. Season with salt and pepper to taste. Stir in the pickle relish if using.
-
Spoon or pipe the filling into each egg white half, dividing evenly among the 24 halves.
-
Sprinkle with paprika just before serving. Keep refrigerated until ready to serve.
Recipe Notes
For best results, use eggs that are a week or two old — they peel much easier than very fresh ones. Keep filling and whites separate if making more than a few hours ahead.
Common Questions
More Recipes You’ll Love
- Nana Ruth’s Scalloped Potatoes
- Church Potluck Dill Pickle Dip
- Bunny Bait Snack Mix
- Nana Ruth’s Brown Sugar Meatloaf (The Recipe That Almost Disappeared)
What I Use for This Recipe
A couple things from my kitchen that make this one easier.

Pancakes slide right off. Eggs never stick. The pan the kids are actually allowed to use.
Casseroles, brownies, brunch bakes. I own three and somehow always need a fourth.
Potatoes, apples, carrots. The soft handle means even Mason can help with Sunday dinner prep.
This post contains affiliate links. As an Amazon Associate, I earn from qualifying purchases at no extra cost to you. I only recommend tools I actually use. See all my kitchen picks