Everybody’s talking about the air fryer, and I get why. It’s fast, it’s easy, and it makes things crispy without a pot full of oil. But most of the air fryer recipes I see online feel like they’re trying too hard.
Wyatt calls these “crispy chicken” and asks for them at least once a week. Jake was skeptical about the air fryer at first — he’s an oven-and-cast-iron kind of guy — but even he admits these come out crispier than anything I could do in the oven.
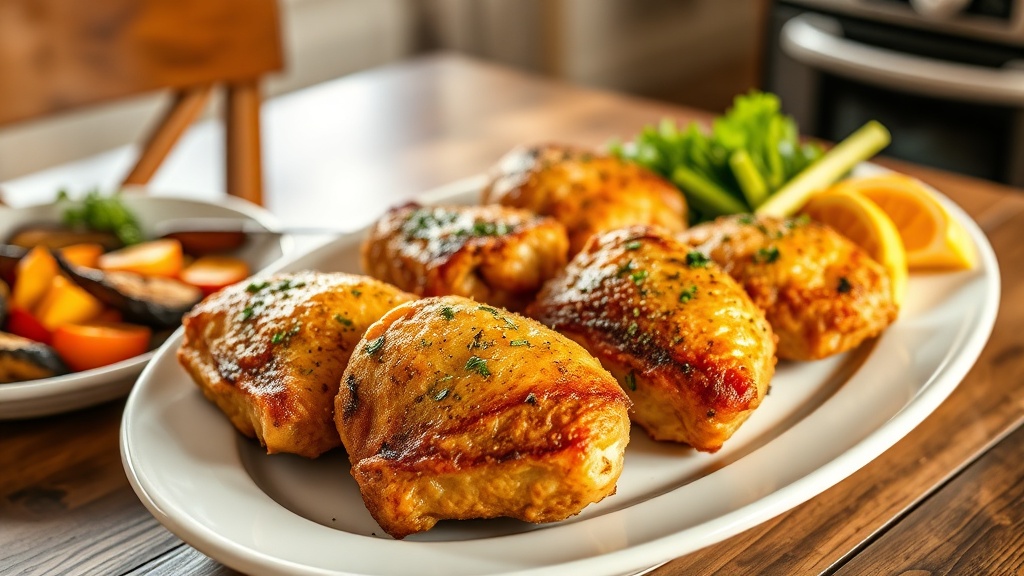
So here’s what I did: I took the chicken thighs my grandmother made every Sunday — the ones seasoned with nothing fancier than garlic powder, paprika, salt, and pepper — and I put them in the air fryer. And friends, they came out better than the oven. The skin was so crispy it crackled when you cut into it, and the meat was juicy all the way through.
The trick is simple and old-fashioned: pat the chicken dry. Nana Ruth said it every time she made fried chicken — “Dry it off or don’t bother.” Same rule applies here. Dry skin crisps. Wet skin steams. That’s the whole secret.
This is a 35-minute dinner that feeds a family of five for under ten dollars.
How to Make Air Fryer Chicken Thighs
Pat the chicken dry. This is the most important step. Use paper towels and really press the moisture out of the skin. Season generously with garlic powder, smoked paprika, onion powder, salt, and black pepper. A light brush of oil helps the seasoning stick and boosts crispiness.
Arrange in the air fryer. Place thighs skin-side up in a single layer — don’t overlap them or stack. Air needs to circulate around every piece. You may need to work in batches depending on your air fryer size.
Cook at 400°F for 25 minutes. Start skin-side up and don’t flip. The high circulating heat crisps the top while the fat renders from the bottom. Check with a meat thermometer — you want 185-190°F for thighs (higher than the 165°F minimum, because thigh meat is best when cooked through to render the fat).
Rest 5 minutes before serving. Let the thighs rest on a plate so the juices redistribute. Serve with rice, roasted vegetables, or a simple salad. The crispy skin stays crunchy for about 10 minutes — eat it while it’s hot.
If these thighs become a regular in your rotation (and they will), try my Yogurt-Marinated Roast Chicken for Sunday nights when you have a little more time. My Chicken Dumpling Soup is perfect for stretching leftover chicken into a whole second meal. And if you want another quick weeknight option, my Sweet & Spicy Honey Butter Chicken is just as fast and twice as sticky.

Nana Ruth's Air Fryer Chicken Thighs
Ingredients
- 6-8 bone-in, skin-on chicken thighs
- 1 tablespoon olive oil
- 1 teaspoon garlic powder
- 1 teaspoon smoked paprika
- 1/2 teaspoon onion powder
- 1/2 teaspoon dried thyme
- 1 teaspoon salt
- 1/2 teaspoon black pepper
Instructions
-
Pat the chicken thighs completely dry with paper towels — both sides. This is the most important step for crispy skin.
-
Drizzle the chicken with olive oil and rub it all over. Mix the garlic powder, smoked paprika, onion powder, thyme, salt, and pepper together, then season both sides of each thigh generously.
-
Preheat your air fryer to 400°F. Arrange the chicken thighs skin-side down in a single layer — don't overlap them. Work in batches if needed.
-
Cook skin-side down for 10 minutes. Flip to skin-side up and cook another 12-15 minutes until the skin is golden and crispy and the internal temperature reaches 165°F at the thickest part.
-
Let the chicken rest for 5 minutes before serving. The juices need time to settle back into the meat — cut too early and all that goodness runs out onto the plate.
-
Serve with mashed potatoes, a green salad, or rice. These play well with just about any side you've got.
Recipe Notes
Every air fryer runs a little different — mine runs hot. Use a meat thermometer and check for 165°F rather than relying on time alone. If cooking in batches, the first batch stays warm on a plate while the second cooks.
Common Questions
Nana Ruth’s Air Fryer Chicken Thighs
Crispy-skinned, juicy chicken thighs seasoned simply and air fried to perfection. The same flavors Nana Ruth used on her Sunday chicken, but with a crunch that rivals deep-frying — all in about 35 minutes.
- 6-8 bone-in, skin-on chicken thighs
- 1 tablespoon olive oil
- 1 teaspoon garlic powder
- 1 teaspoon smoked paprika
- 1/2 teaspoon onion powder
- 1/2 teaspoon dried thyme
- 1 teaspoon salt
- 1/2 teaspoon black pepper
- Pat the chicken thighs completely dry with paper towels — both sides. This is the most important step for crispy skin.
- Drizzle the chicken with olive oil and rub it all over. Mix the garlic powder, smoked paprika, onion powder, thyme, salt, and pepper together, then season both sides of each thigh generously.
- Preheat your air fryer to 400°F. Arrange the chicken thighs skin-side down in a single layer — don’t overlap them. Work in batches if needed.
- Cook skin-side down for 10 minutes. Flip to skin-side up and cook another 12-15 minutes until the skin is golden and crispy and the internal temperature reaches 165°F at the thickest part.
- Let the chicken rest for 5 minutes before serving. The juices need time to settle back into the meat — cut too early and all that goodness runs out onto the plate.
- Serve with mashed potatoes, a green salad, or rice. These play well with just about any side you’ve got.
Every air fryer runs a little different — mine runs hot. Use a meat thermometer and check for 165°F rather than relying on time alone. If cooking in batches, the first batch stays warm on a plate while the second cooks.